Microsoft Entra ID App registration
To configure Entra ID as Idenity Provider in Central NAC, you will need the following information:
- Client ID
- Client Secret
- Tenant ID
-
Log into Entra ID and navigate to Entra ID > App registrations > New registration
Create new App Registration 
-
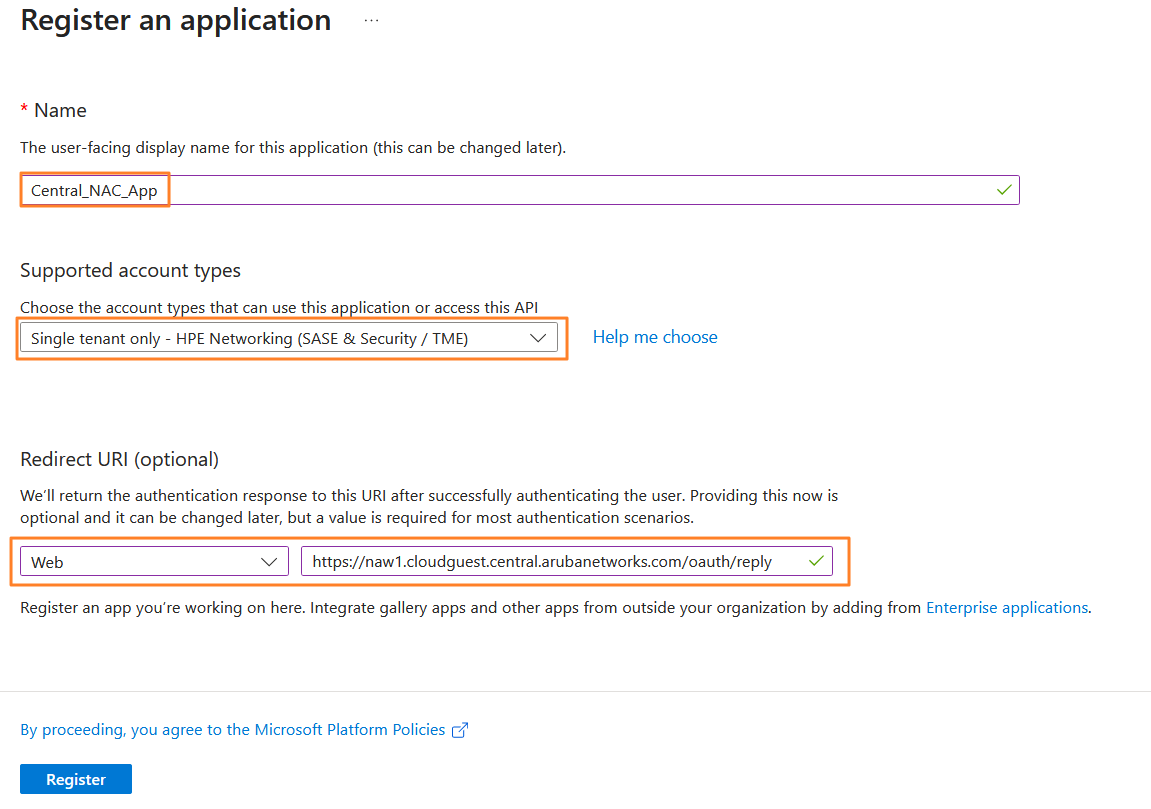
Register a New Application by filling in the form using below details.
Name → Enter your application name
Supported account types → Single tenant only
Redirect URI (Web) → Copy the Redirect URI from the configuration page of Central NAC → Identity Provider Card

-
Click Register
-
Next, Click on Add a certificate or secret to generate the client secret.
Adding client credentials 
Click on New client secret > Add a client secret, define a description and click Add

Copy the Value of client secret to use it later on the Central NAC while adding the Identity Provider.

Configuring API permissions
-
Click on API permissions > Add a permission > Microsoft Graph to start adding permissions required to make API calls to Entra ID from your Central NAC tenant.

-
Select the permissions shown in the table below and click on Add Permissions

Microsoft Graph API permissions:
| Permission | Type | Description |
|---|---|---|
| Directory.Read.All | Application | Read directory data |
| Group.Read.All | Application | Read all groups |
| User.Read | Delegated | Sign in and read user profile |
| User.Read.All | Application | Read all users’full profiles |
- Grant admin consent to the permissions added in the earlier step. Note that you will require administrative privileges to be able to Grant admin consent for the permissions.

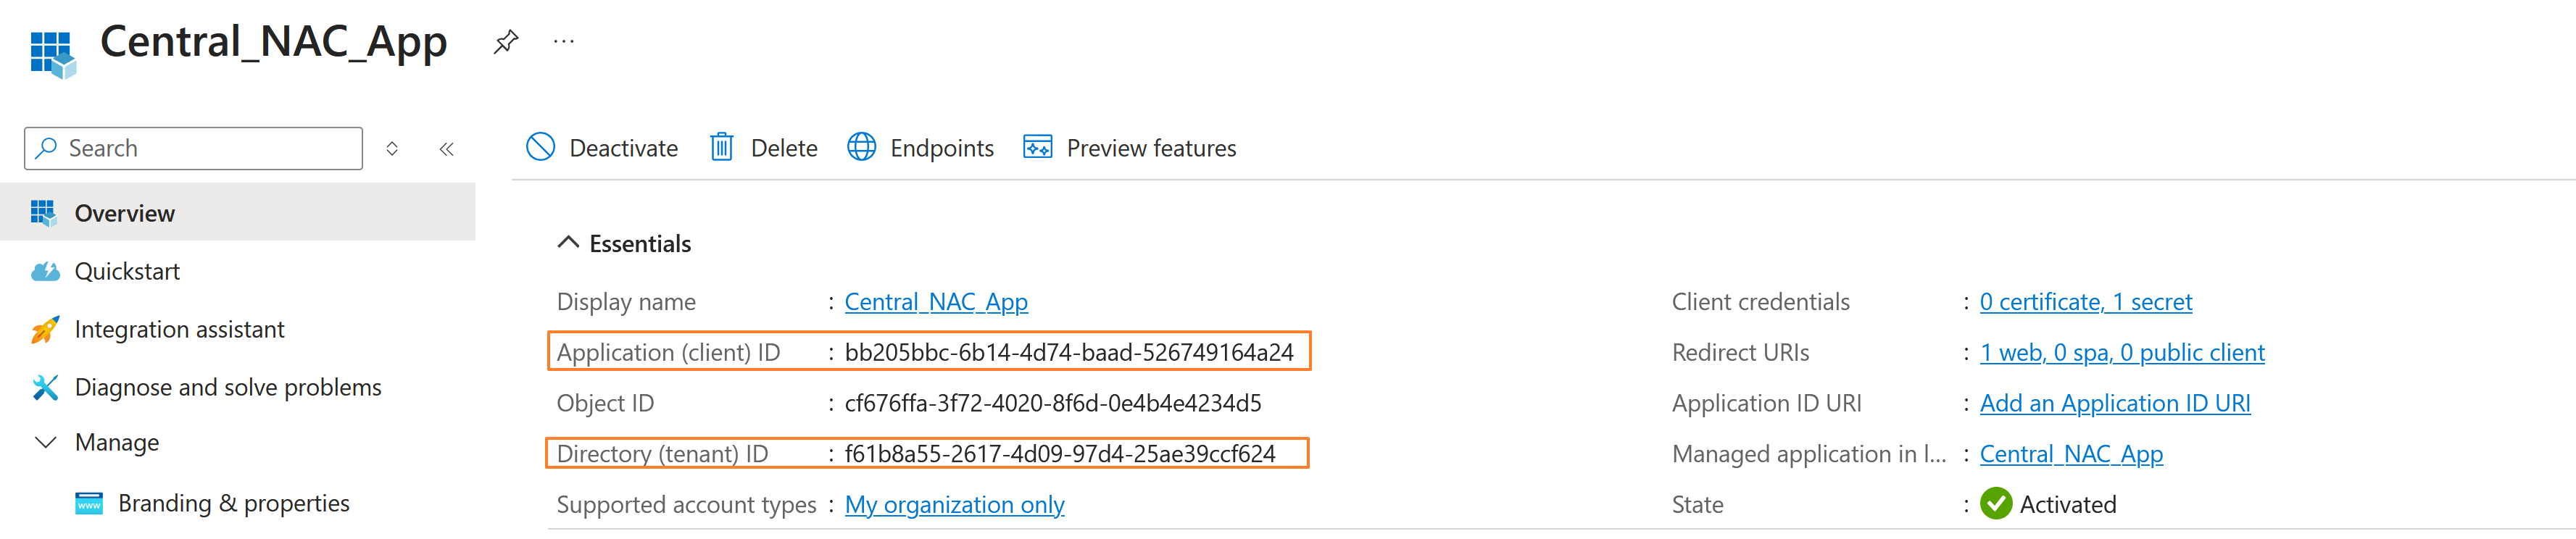
You can now copy the TenantID and ClientID from the overview page of the added application. Use the Client secret copied earlier along with the Tenant ID and Client ID to configure Entra ID as an IDP in Central NAC.
Configuring Entra ID as IDP
Within Central NAC, Navigate to Configuration > Identity Mangement > Manage as shown below.

Click on Create Identity Store to create the IDP

Provide a Name, select Microsoft Entra ID as the identity provider, and enter the Tenant ID along with the Client ID and Client Secret generated for the registered application in your Entra tenant and click on Create.
