Google Workspace
4 minute read
To configure Google Workspace as Idenity Provider in Central NAC, you will need the following information:
- Customer ID
- Google Workspace Domain
- Administrator Email
- OAuth2.0 Client ID
- Client Secret
- Service Account Crentials File
Getting the Customer ID and Domain Information
-
Login to Google Admin Console and navigate to Account > Account settings. Copy the Customer ID from the Profile section.
Copying customer ID 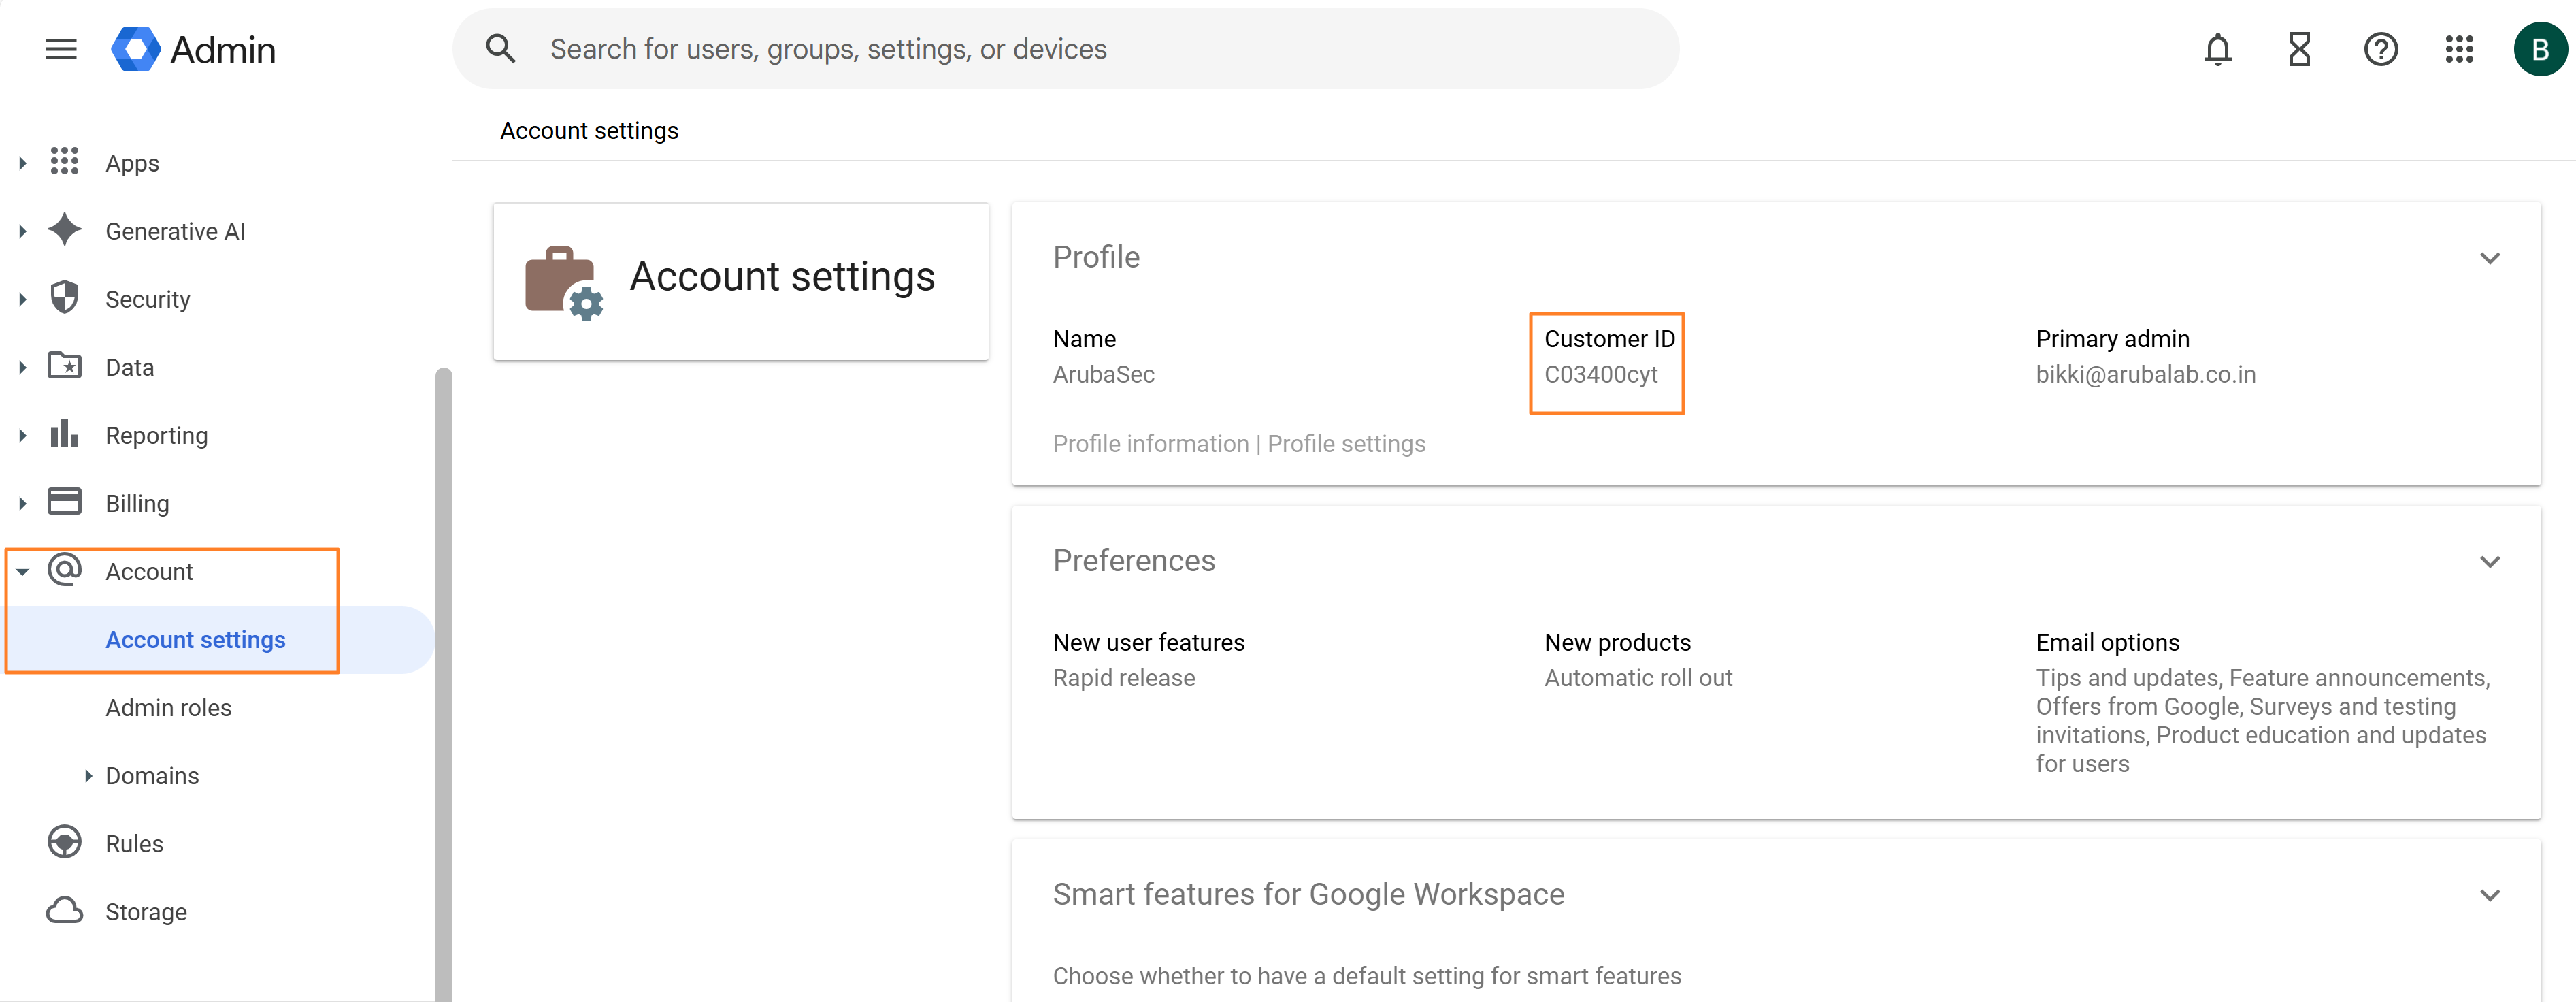
-
Navigate to Account > Domains > Manage domains and copy the domain name.
Copying domain name 
Creating a Project for Central NAC in Google Cloud Console
-
Login to your Google Cloud Console as an administrator and navigate to Project Picker > New Project from the home screen.
Create a new project 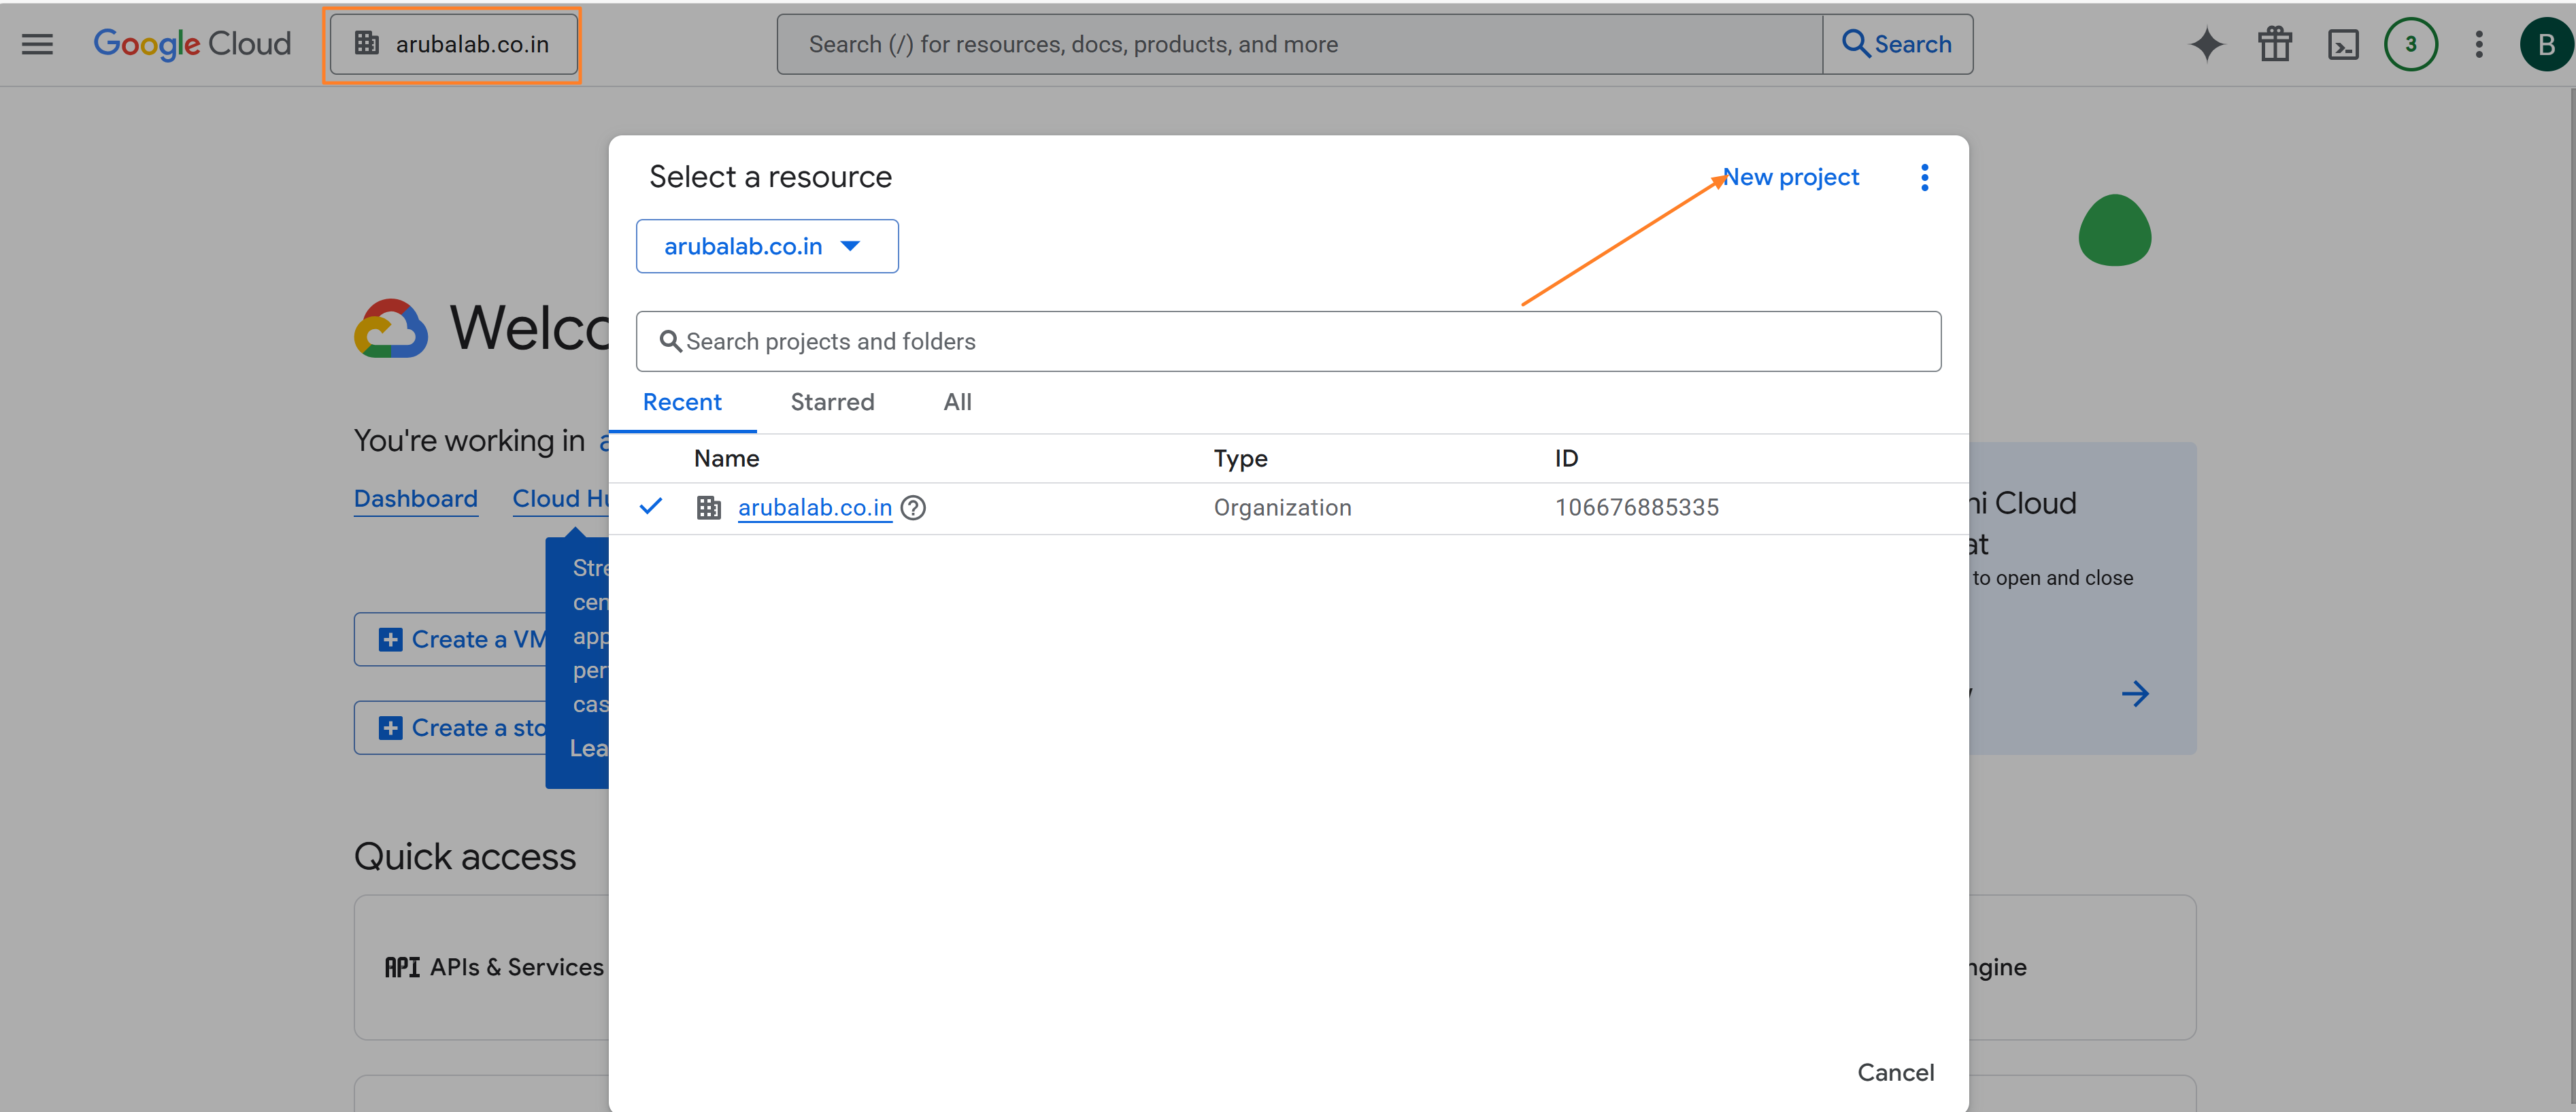
-
Provide a suitable Project Name (for example, Central NAC), select the Organization and Parent Resource, and then click Create.
Create a new project 
-
Now switch to the project that was created from the Project Picker.
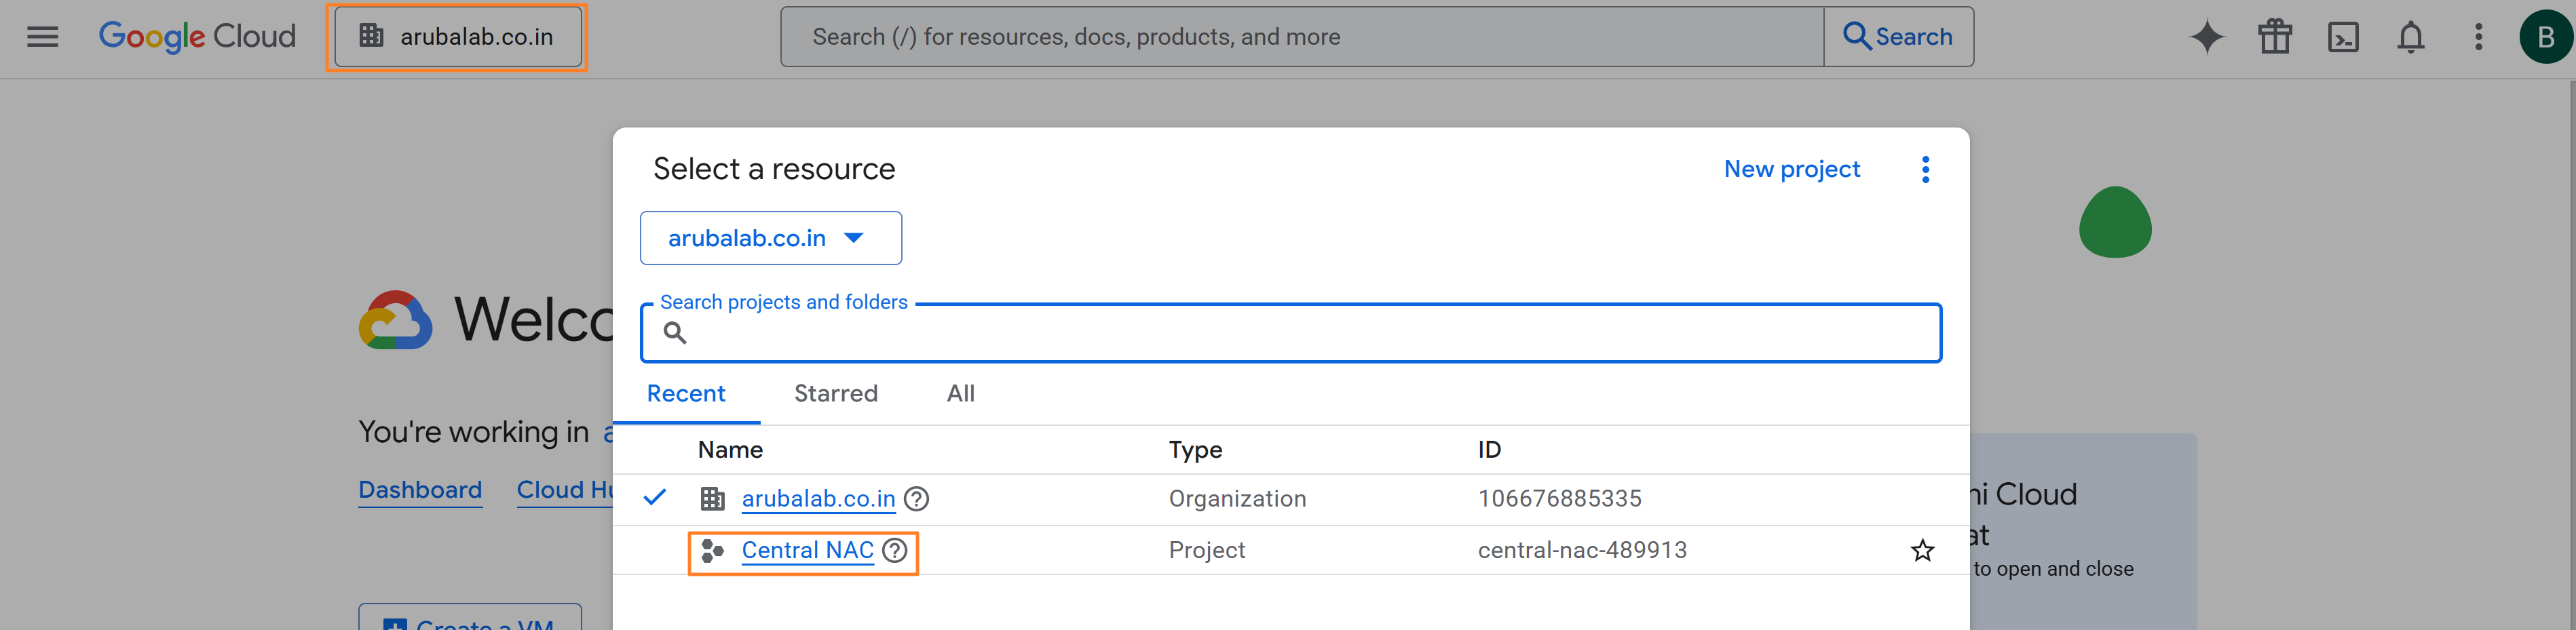
Create OAuth 2.0 Client ID and Client Secret
-
From the hamburger menu in the top-left corner, go to APIs & Services > Credentials.
Creating OAuth 2.0 Client ID and Client Secret 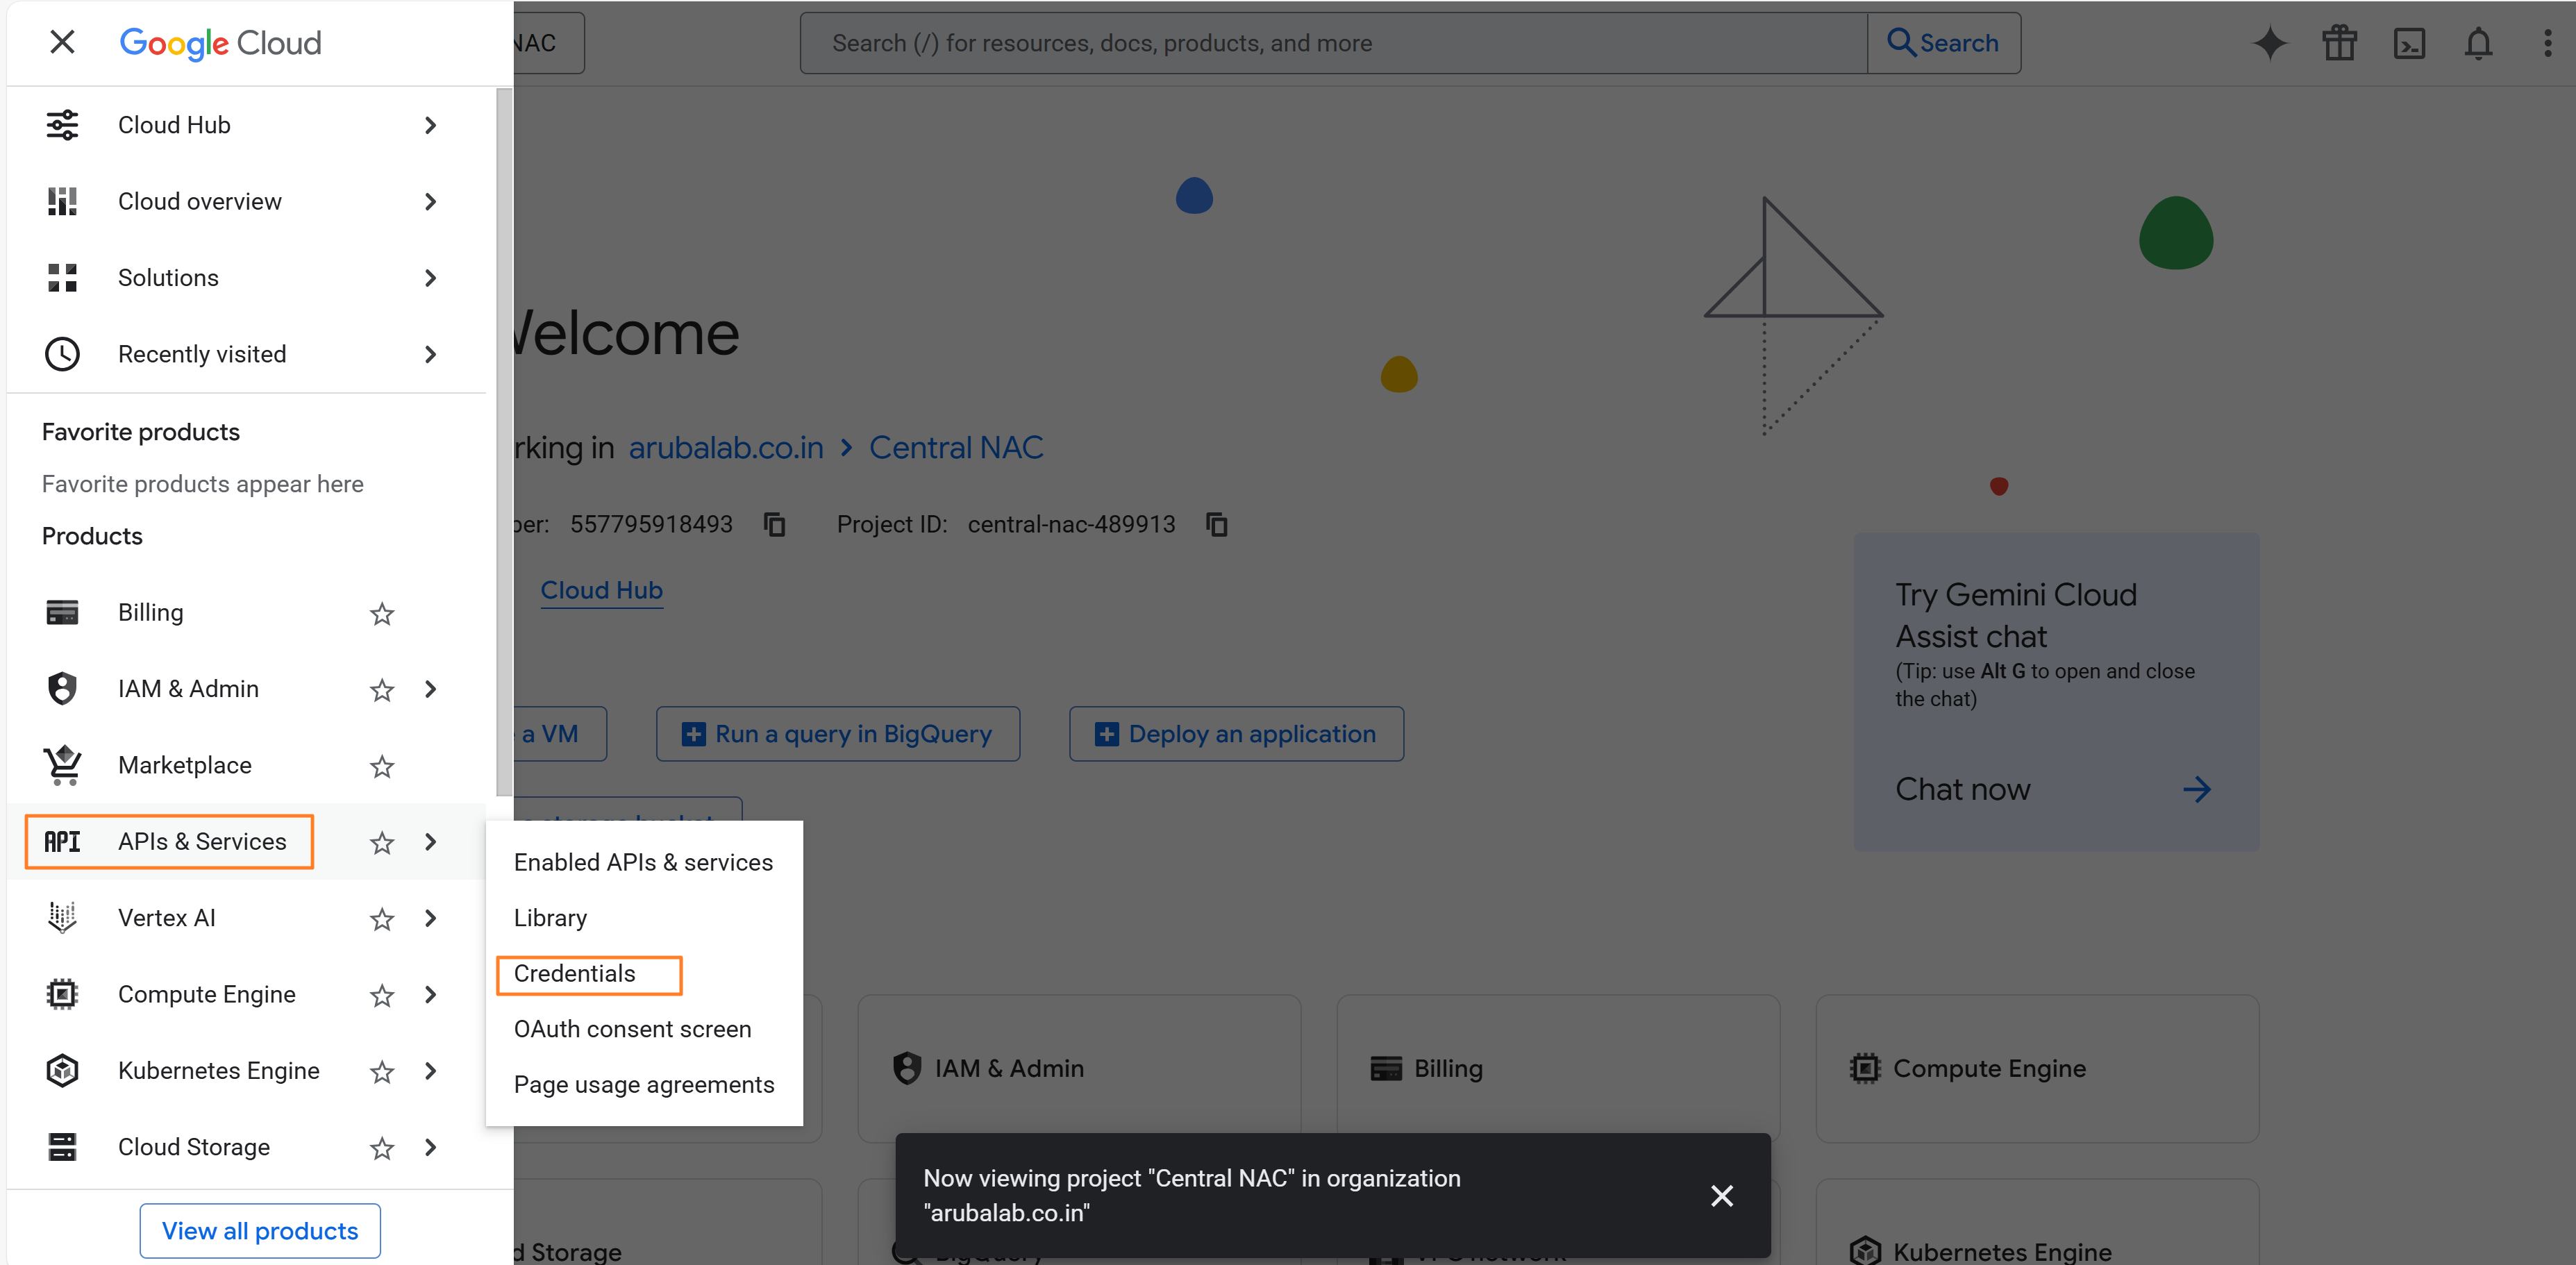
-
The OAuth consent screen must be configured before you can create an OAuth Client ID and Client Secret. To configure the consent screen, either click Configure consent screen from the banner displayed on the page or navigate to the OAuth consent screen menu, as shown below.
Configure consent screen 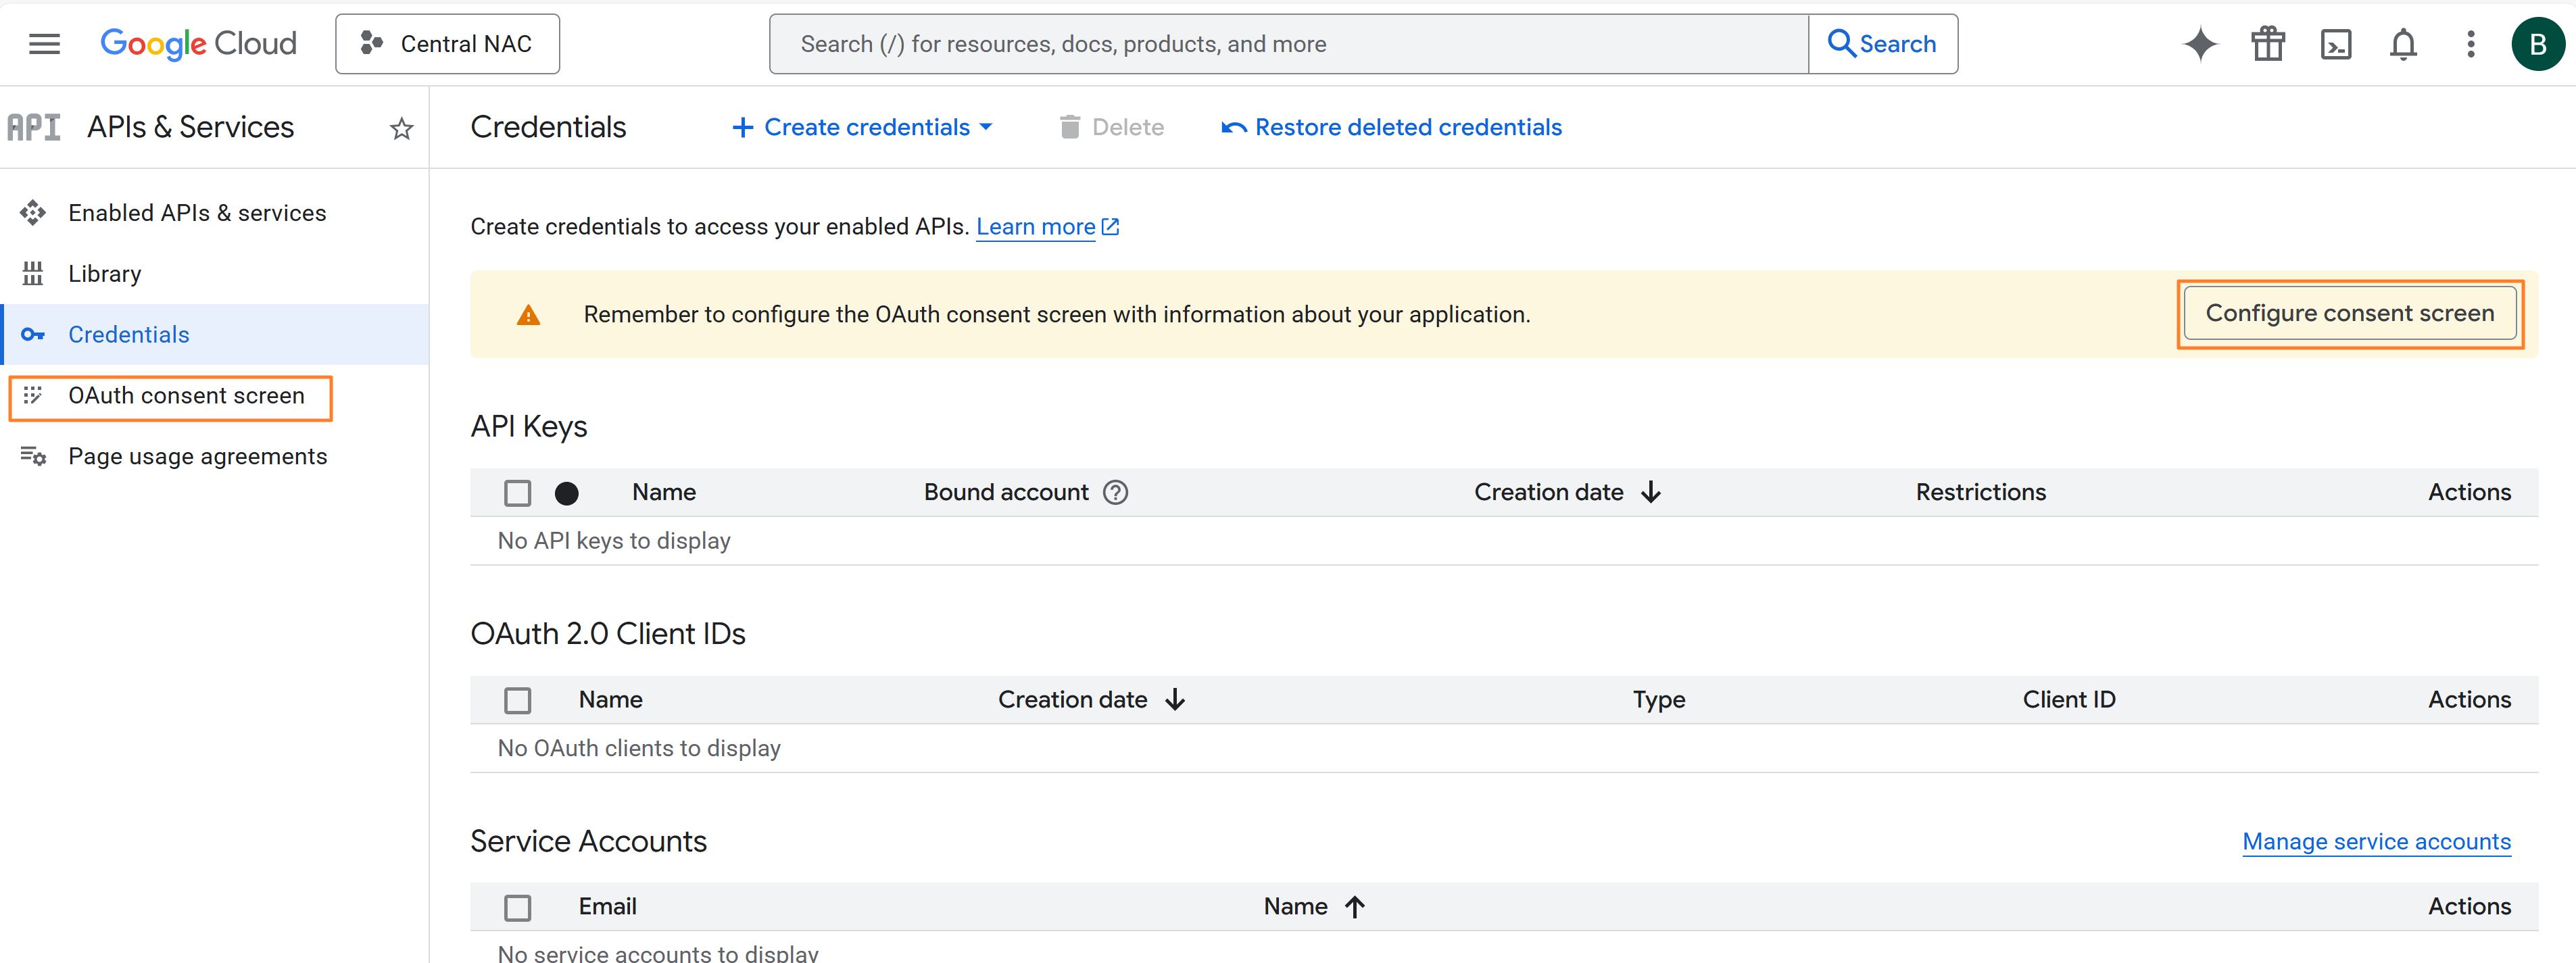
-
Click on Get Started from the Overview Page or follow the onscreen instructions. Enter a suitable App name and a User support email and click Next.

-
Choose Internal as the Audience and click Next.
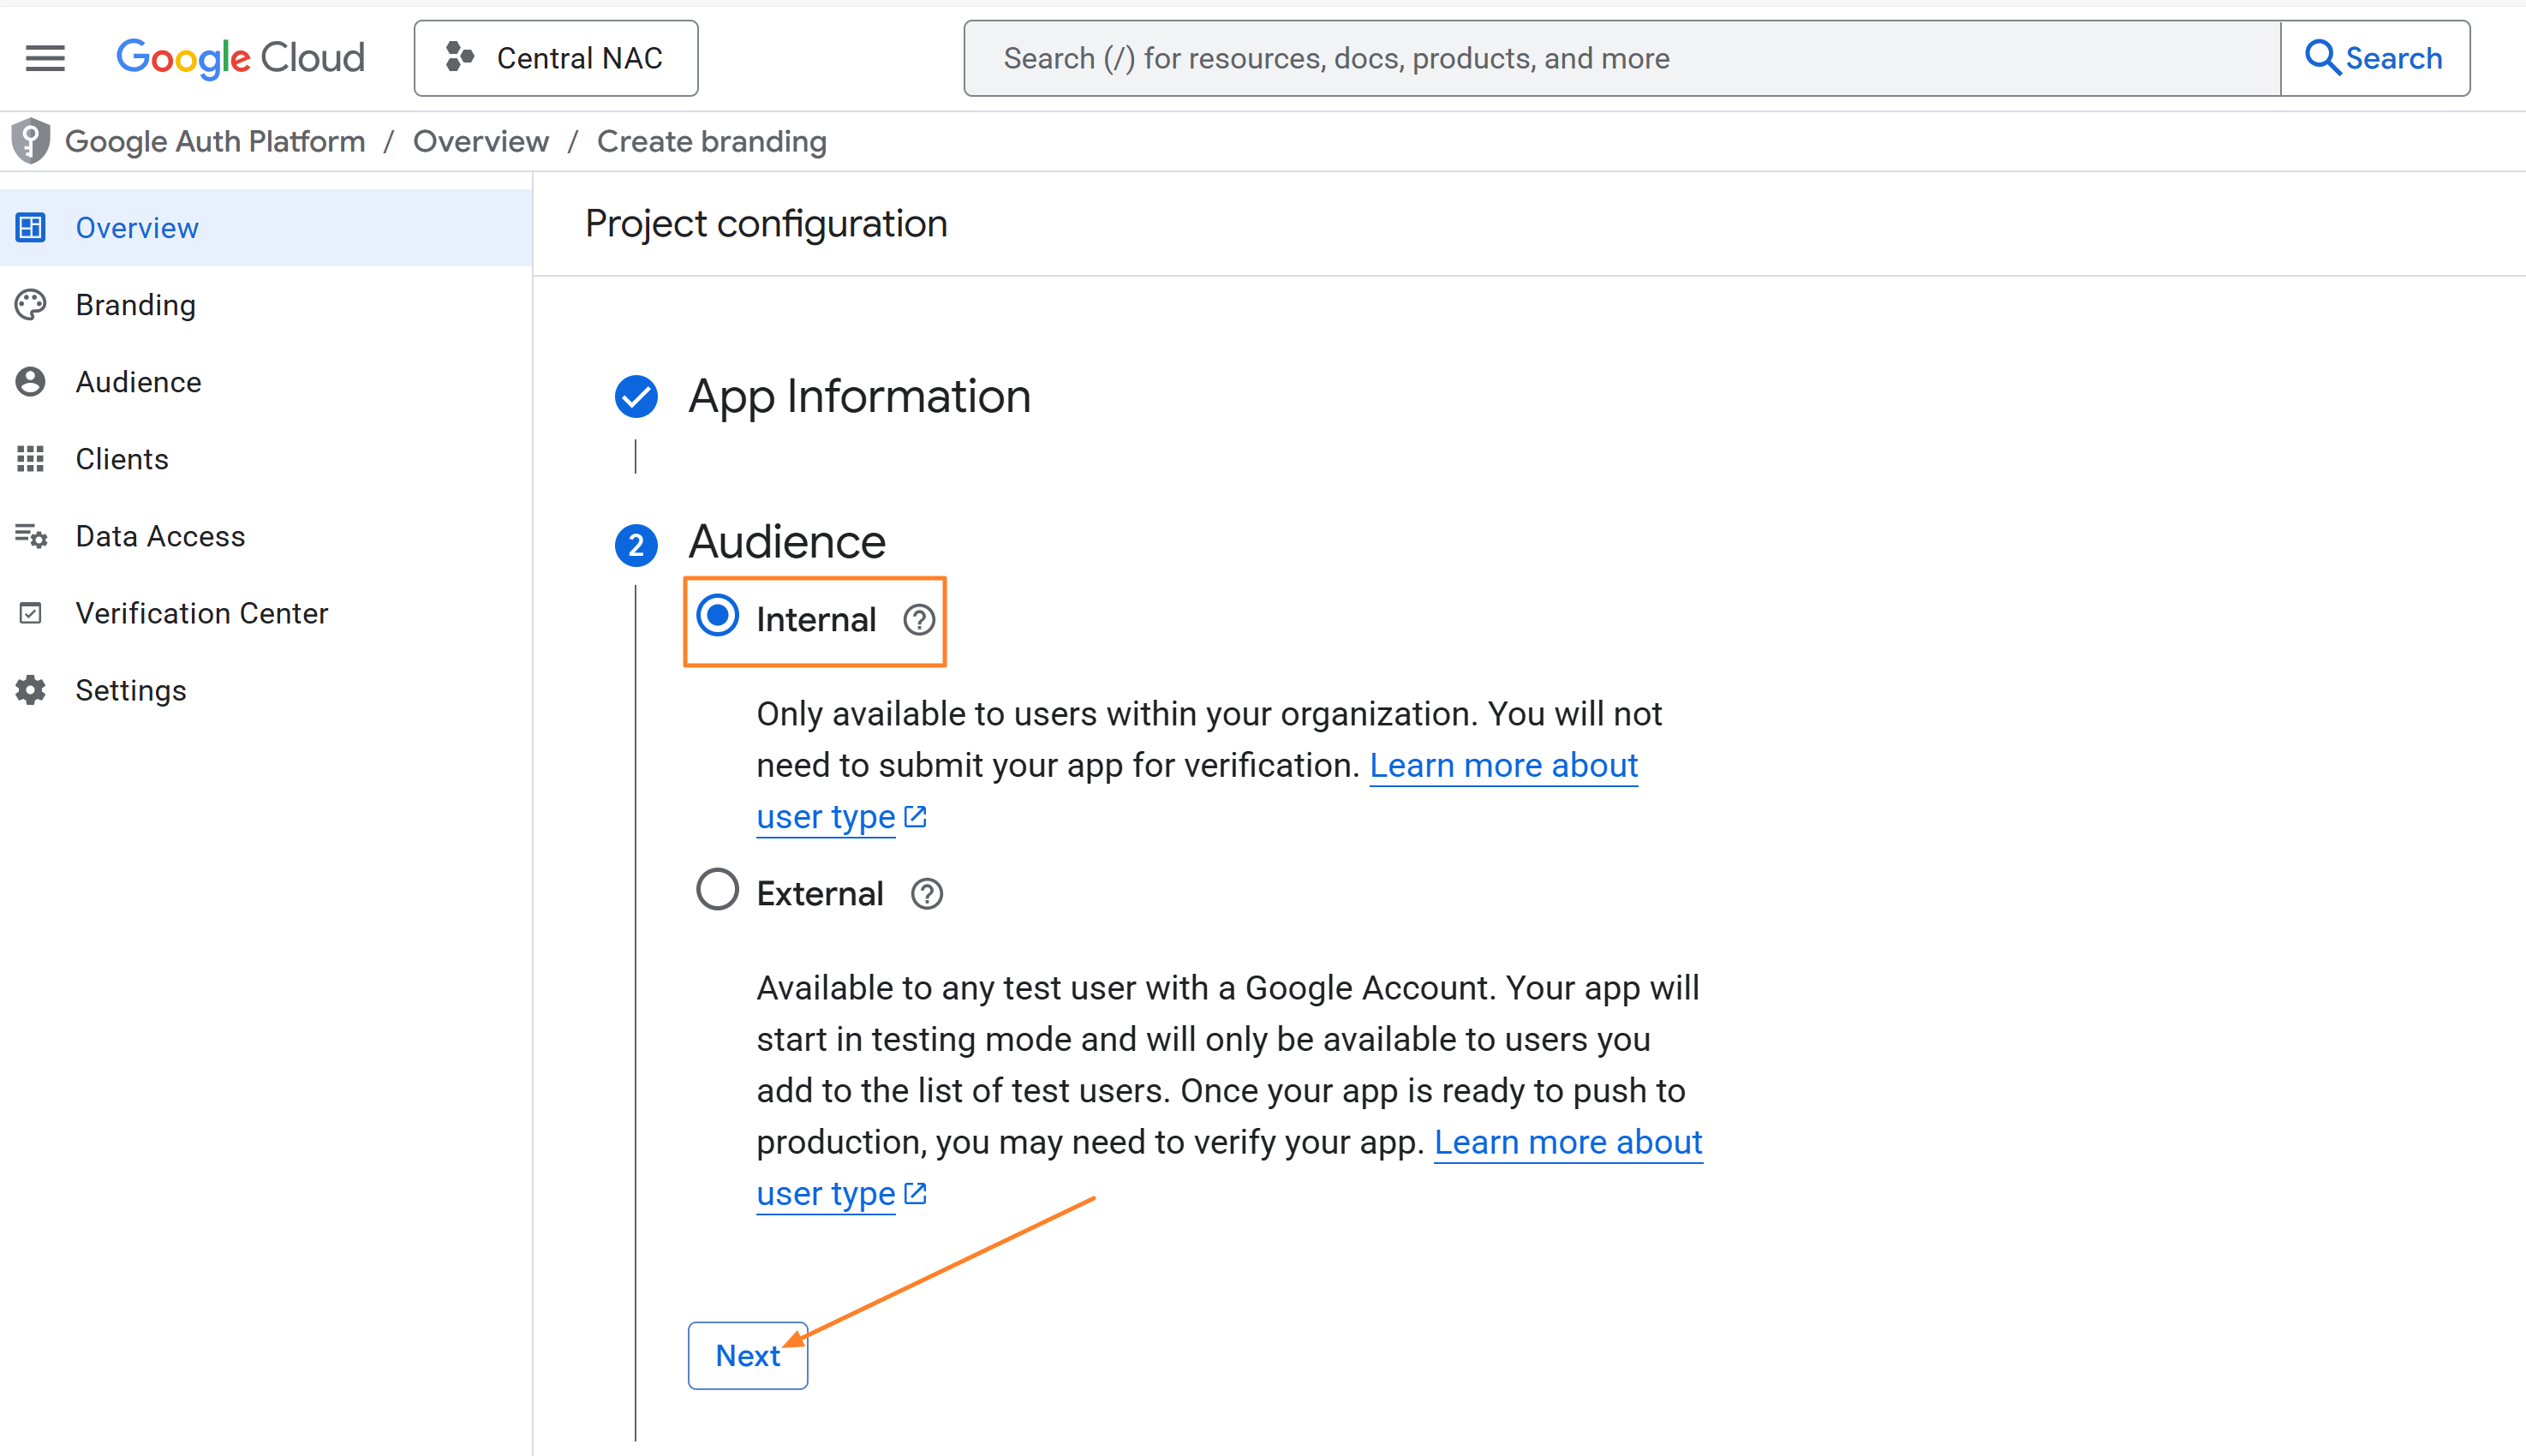
5.Enter the email addresses that should receive notifications from Google for any changes to your project under Contact Information, Agree to the Google API Services:User Data Policy on the Finish page and then click Create.

-
You can now create the OAuth Client Credentials. Click on Create OAuth client from the Overview page or Navigate back to the hamburger menu in the top-left corner, go to APIs & Services > Credentials > Create Credentials > OAuth client ID.
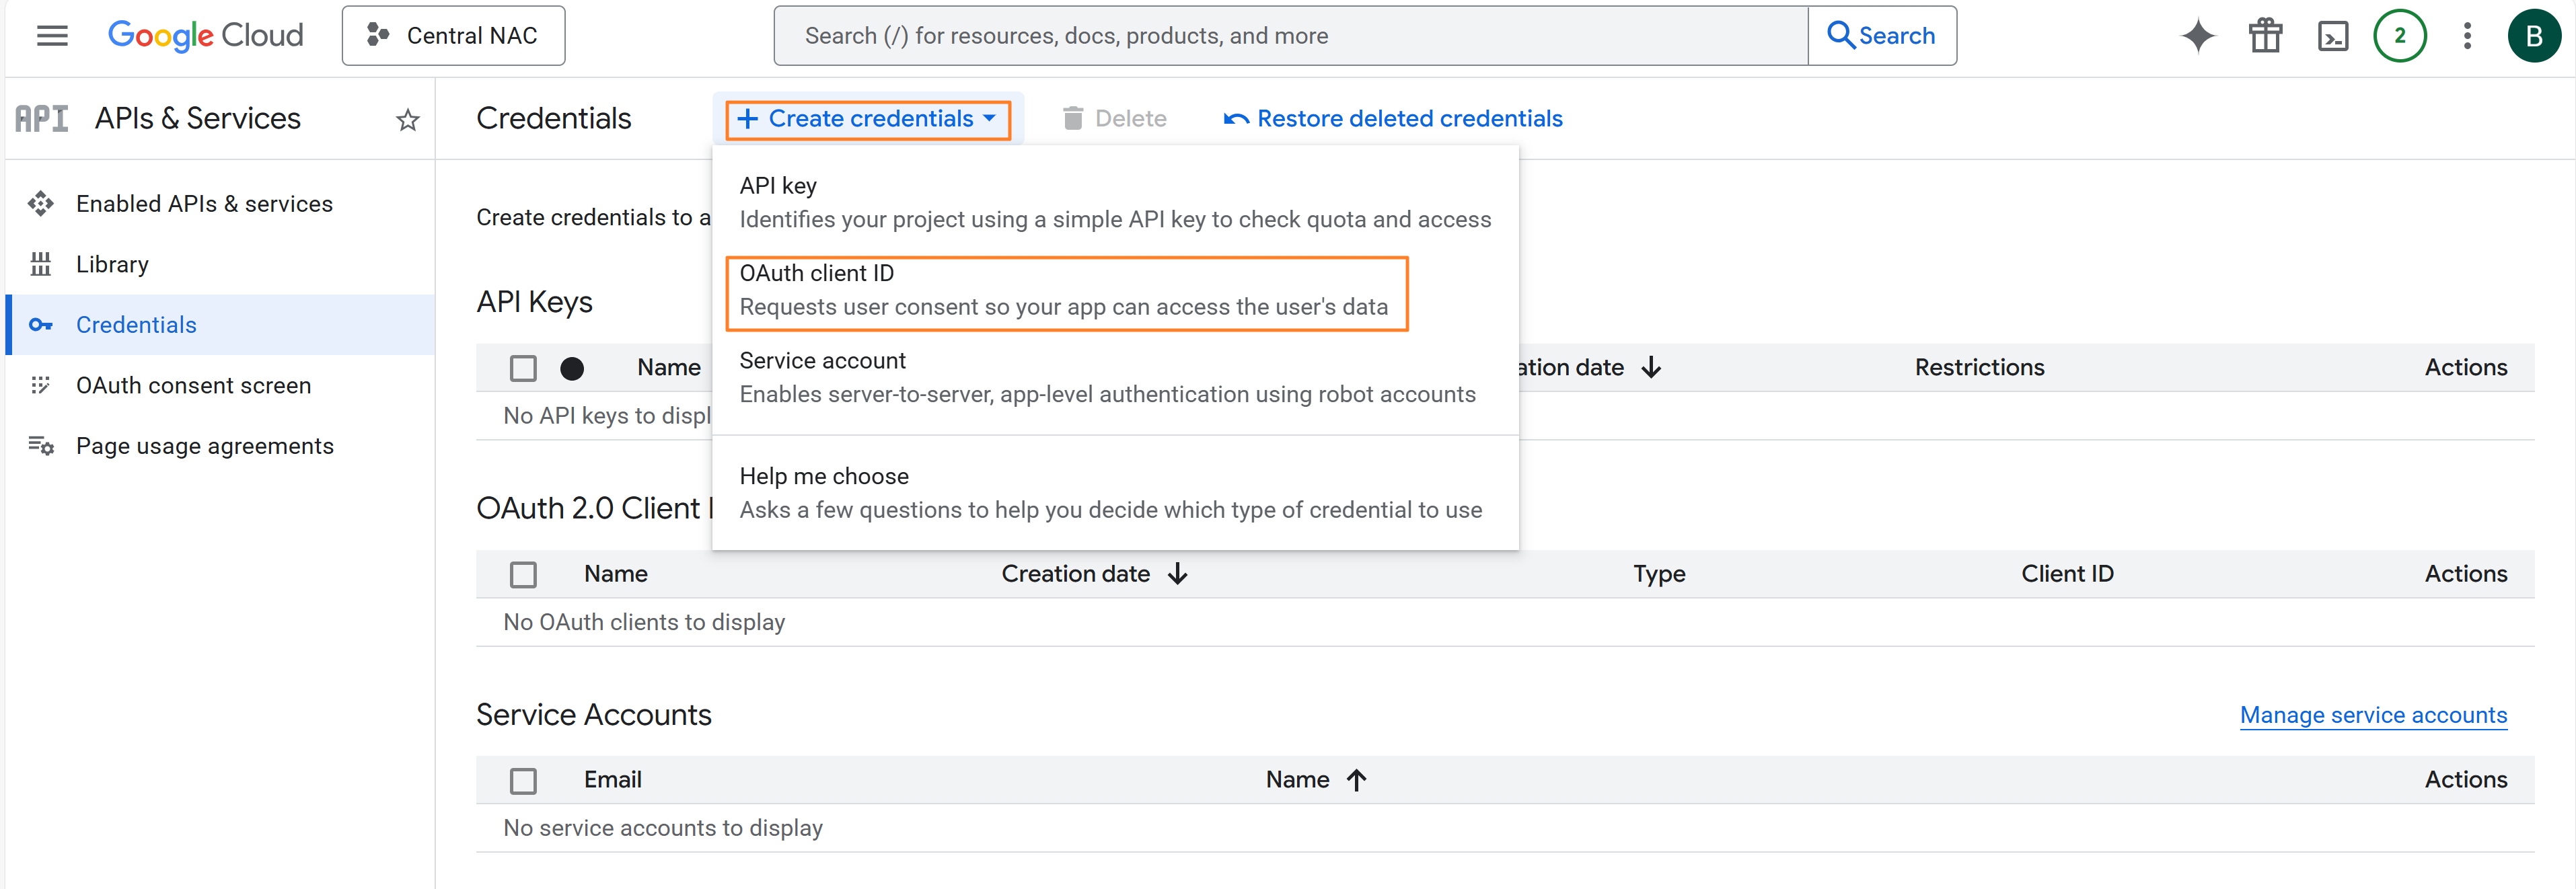
-
Choose Web application as the Application type, Give a Name to your OAuth 2.0 client and scroll down.

-
Click on Add URI under the Authorized redirect URIs, enter the redirect URI and click Create. You can find the redirect URI from Central NAC by navigating to Central NAC > Configuration > Identity Management > Create Identity Store as shown below.

Getting the redirect URI from Central NAC 
-
Copy the Client ID and Client Secret displayed after the OAuth client is created. These will be used later while configuring the IdP in Central NAC.

Creating a Service Account
-
From the hamburger menu in the top-left corner, go to IAM & Admin > Service Accounts.

-
Click Create Service Account to start creating a new service account for the project.

-
Give a name to the Service account, The Service account ID should be auto generated. Click Create and continue to advance to the next steps.

-
The Permissions and Principals with access section is optional and can be skipped by clicking on Continue. Click Done to complete the service account creation.
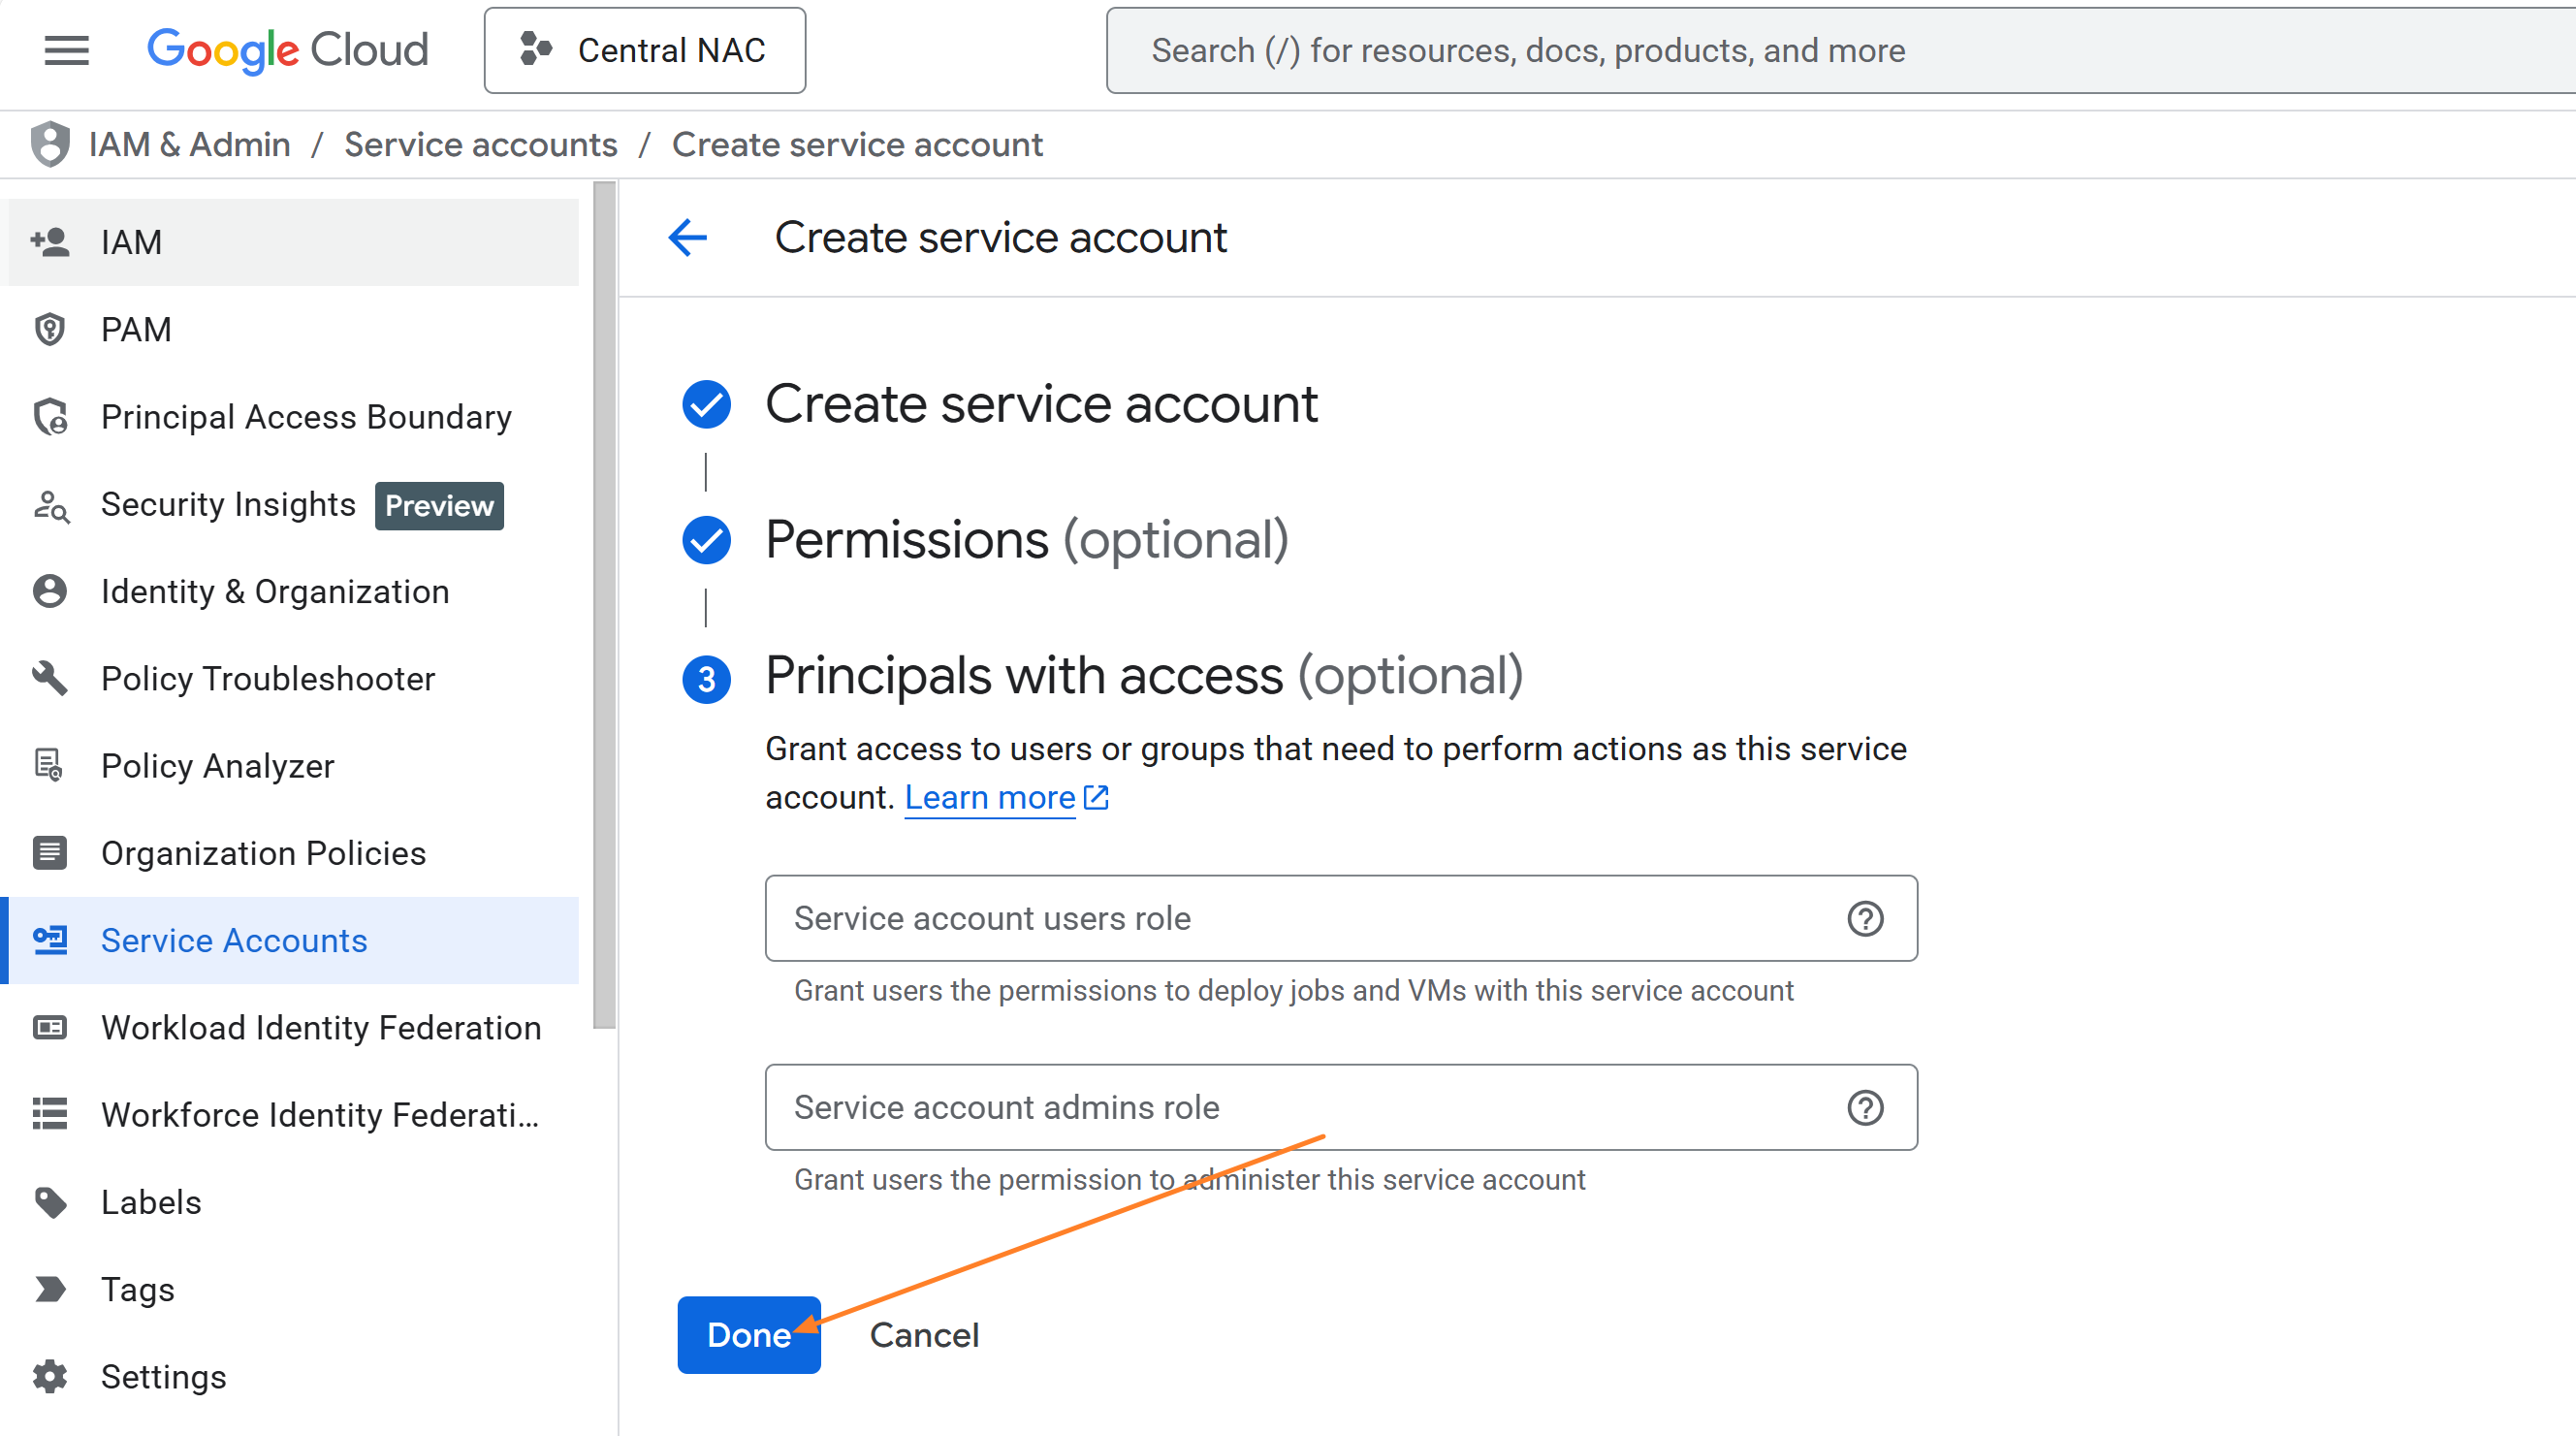
-
Once the account is created, it will be listed on the Service Accounts page. For the service account created for Central NAC, click the Actions menu and select Manage keys.

-
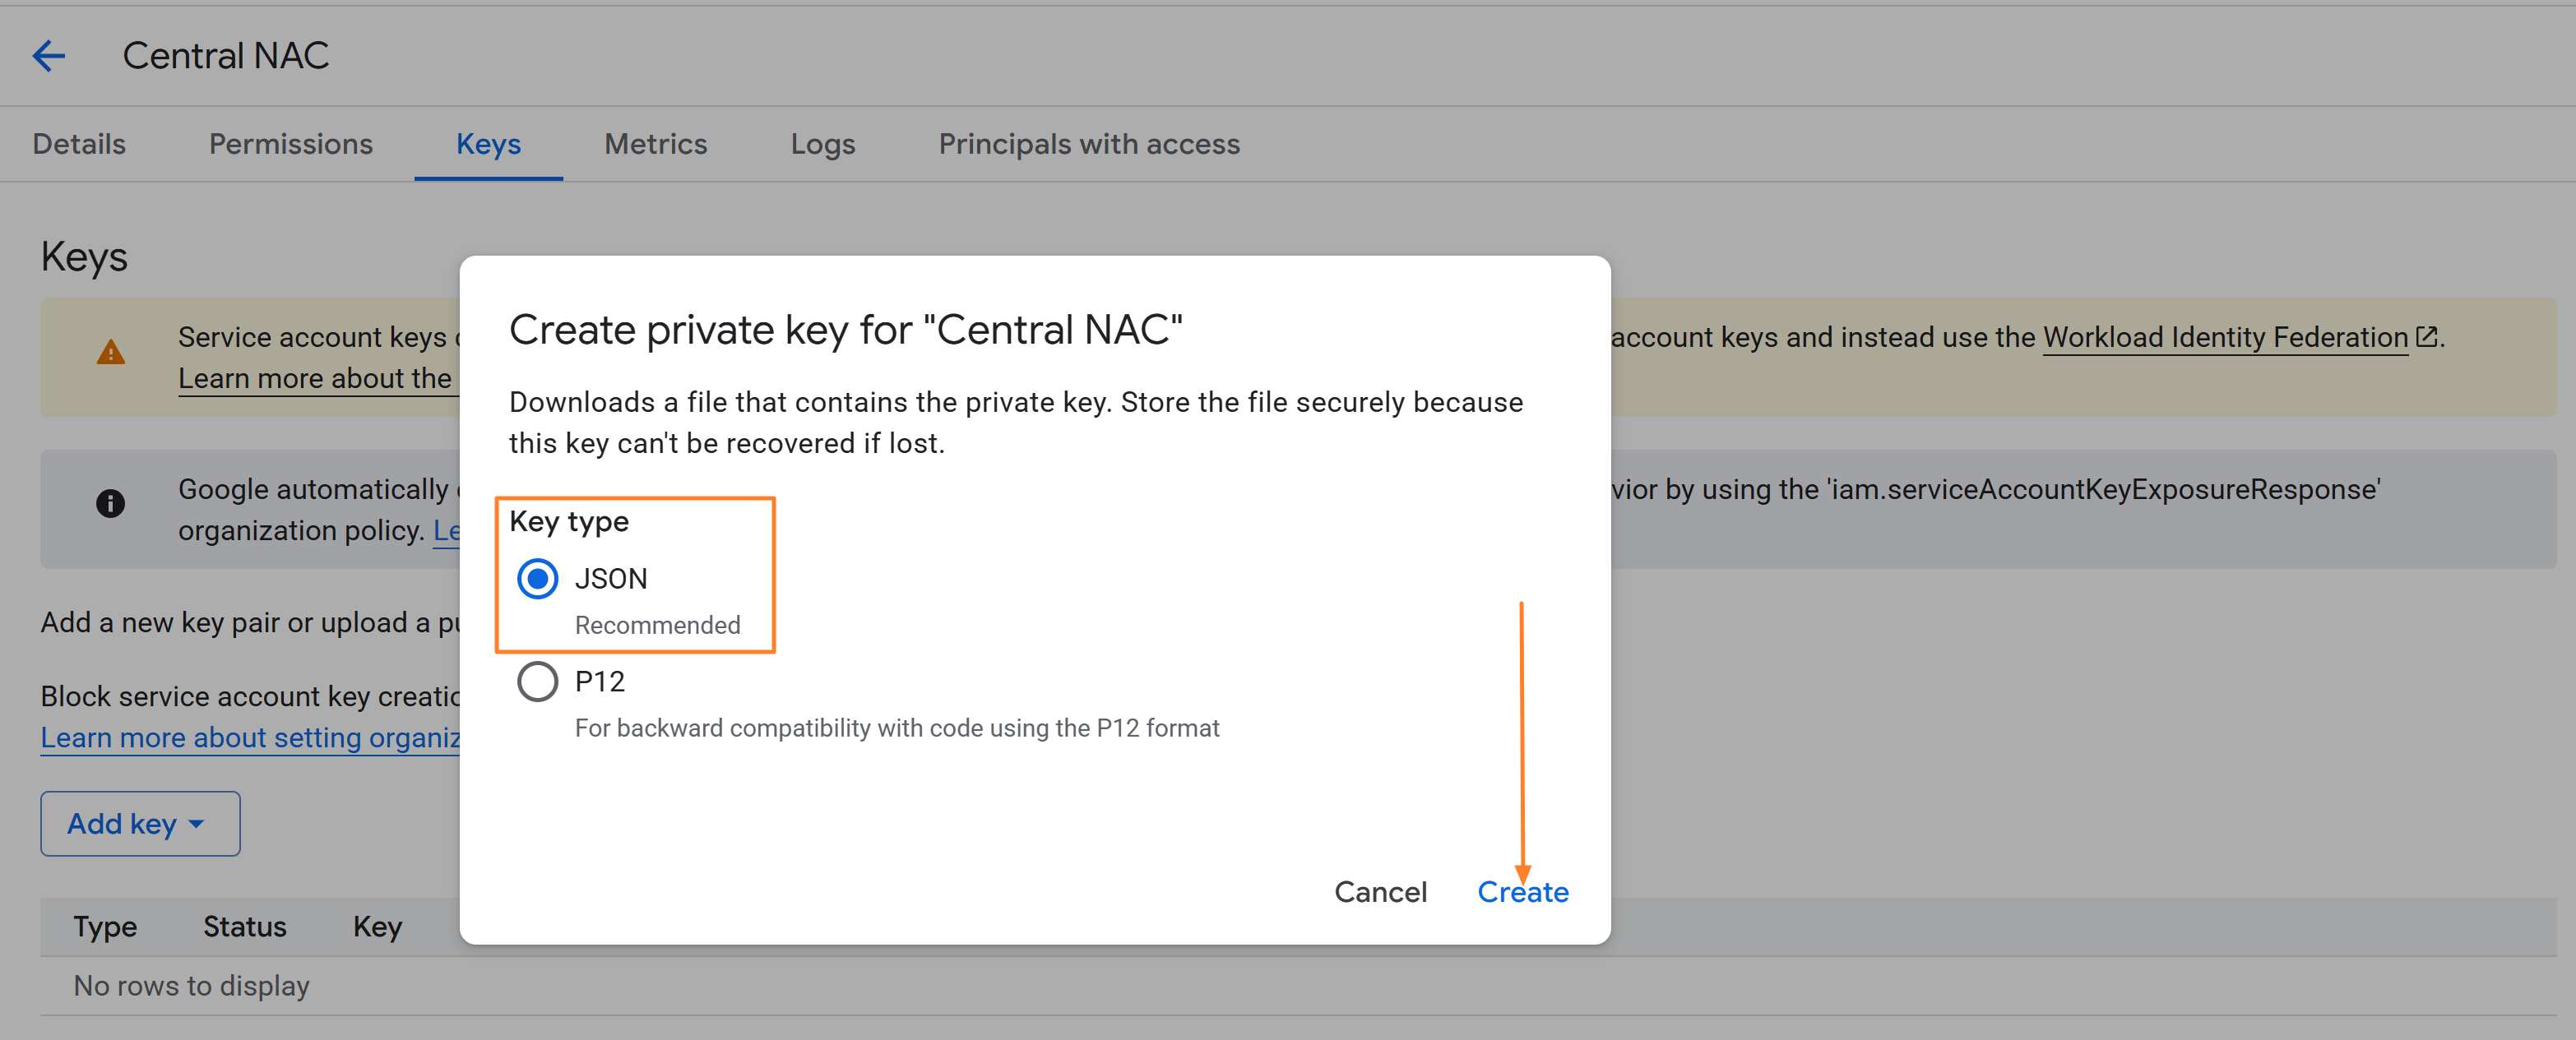
Click on Add Key and select Create new key. Choose Key type as JSON and click on Create. The keys should be downloaded to your computer.

 INFO
INFO
If the service account or key creation fails due to the iam.managed.disableServiceAccountCreation or iam.managed.disableServiceAccountKeyCreation policies being enforced at the organization level, you may need to temporarily disable these policies. This action must be performed by a user with the Organization Policy Administrator role. Once the policies are set to inactive, retry creating the service account or key.
Configuring Google Workspace as IDP in Central NAC
-
Within Central NAC, Navigate to Configuration > Identity Mangement > Manage as shown below.

-
Click on Create Identity Store to create the IDP

-
Provide a Name, select Google Workspace as the identity provider and fill the form using the Customer ID, Domain, Administator Email, Client ID, Client Secret and Credentials file copied from Google Workspace.

Feedback
Was this page helpful?
Glad to hear it!
Sorry to hear that.